08/07/2021
Four tips for rolling forward to the new academic year
Ensure you set up your new school year successfully with our guide to rolling forward with Edulink One.
Article Updated 22/06/2023
Tip 1: Make sure your timetable isn’t published over the Summer.
Many schools like to hide timetables from students and teachers before the new year starts to reduce queries over timetabling, particularly if you still haven’t finalised it.
If the Enable Roll forward switch is ON (found in the General tab in the administration settings) and a new calendar and a new timetable are in place, Edulink One will set an effective date into the new academic year (September) regardless of the current date. This means that the new timetable will now be visible.
It also allows access to seating plans in registers.
If you switch OFF the roll forward function then it will affect logins, data views for students, resources etc and the timetable will not be visible until the start of the new academic year.
Note: You can turn this feature on anytime during the break including after exams results.
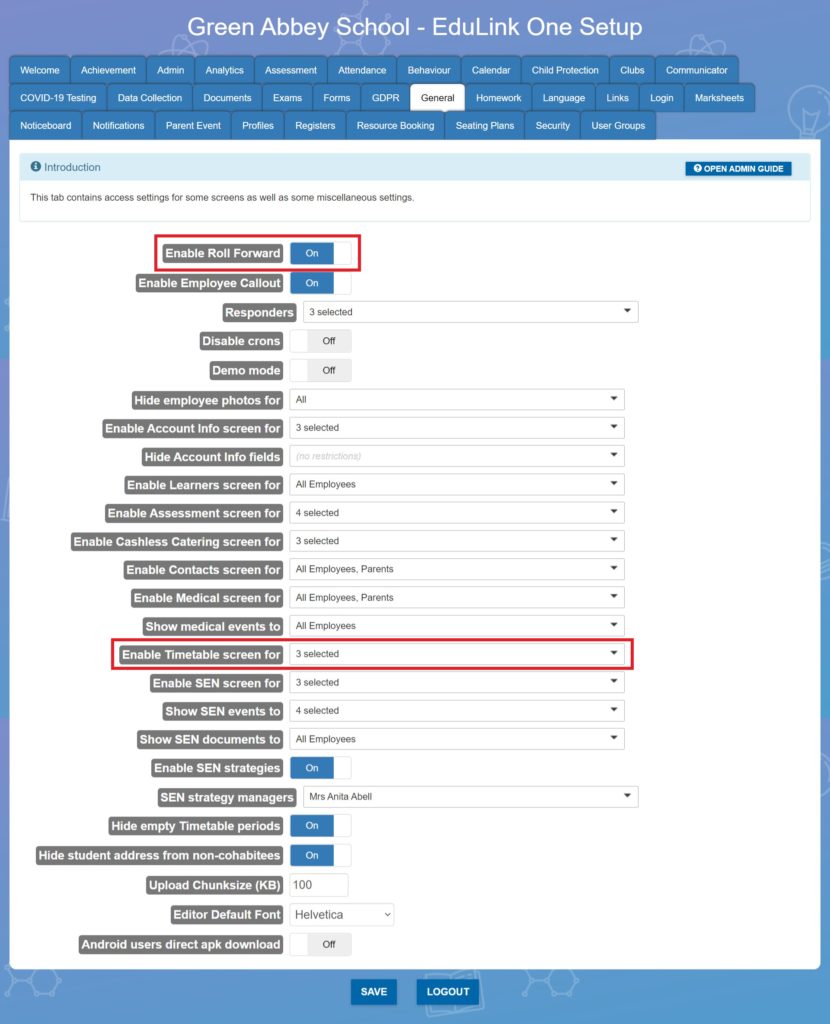
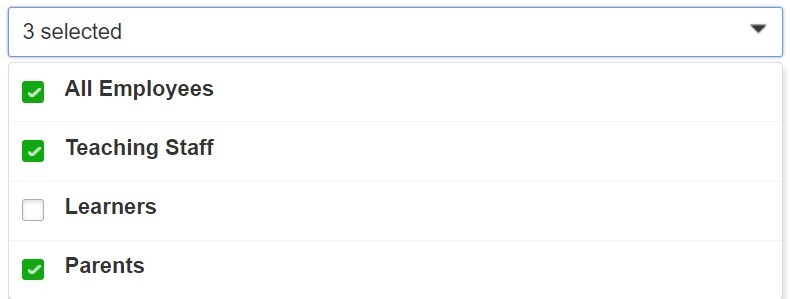
Should you not want the timetable to be visible then just remove access through the settings in the General tab, Enable Timetable screen for. You can select permissions from the dropdown list.
If staff need visibility, then leave roll forward on but deselect learners and parents from the setting below until the start of the academic year.

Tip 2: Decide on how you’re going to release exam results
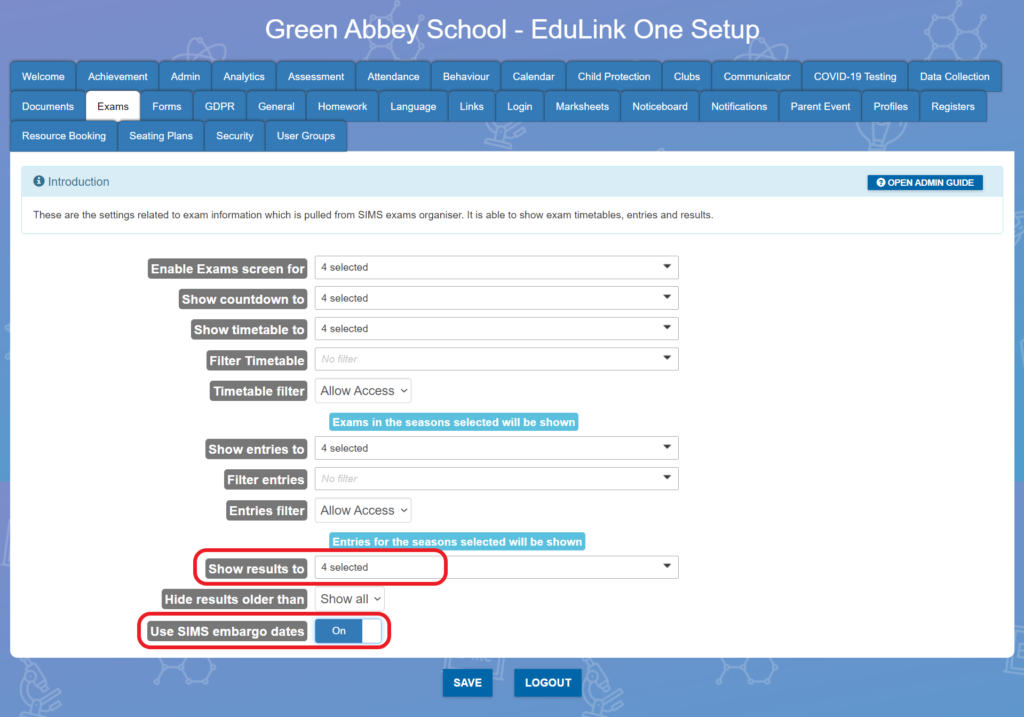
It’s important to consider the potential implications for students, who may not have achieved the results they have hoped for, if they find their results out via Edulink One. They may not have people around to guide and support them. With this in mind, you might want to disable the exam results tab in Edulink One settings for the result days.
This does not prevent you from setting additional embargoes within exams organiser if you would like to extend these periods. Make sure the SIMS embargo setting is ON in the Exams tab to use these periods.
Students must also legally receive their results before parents. Depending on your policy you can add parental access at a later date after students have collected their results.
Simply add Parents to the Show Results To setting manually when you are ready to publish to parents and carers.
Embargo Dates Failsafe Settings
Edulink One will automatically prevent the viewing of any exam results via Edulink between the date/times below:
00:00 16/08/2023 – 08:00am 17/08/2023 AS/A Level
00:00 23/08/2023 – 08:00am 24/08/2023 GCSE
This is designed as a safety net for any customers who forget to set an embargo on the results in SIMS.net.
Please note: This will affect ALL exam results.
Tip 3: Allow leavers to access their exam results in Edulink One
Many schools and students like to give access to exam results via the Edulink One app. However, when a student is taken off-roll, they no longer appear in any groups created in Edulink One and their accounts will be disabled.
If you want students to still have access so they can see their exam results, you need to enable Leaver Login.
Go to the administration settings and select the Login tab. Then you can enable the Leaver Login enabled and Days after leaving date settings.
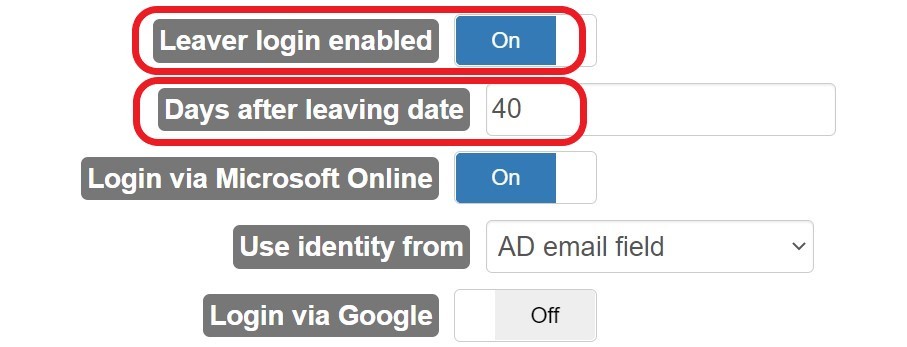
Please make sure the student LDAP accounts have not been disabled. This will re-enable student and parent logins for the specified period, allowing access to exam results online.
You can still contact leavers through the messaging system regardless of this setting.
Tip 4: Save time and collect data for new applicants via Edulink One
Collecting all the necessary data for your new applicants can be a bit of a nightmare – issuing paper forms and getting them back then the challenge of inputting the data and chasing missing information. It’s a huge burden on the administration team. Edulink One makes it simple to do online.
When your new applicants have been given a status of “accepted” in SIMS, we create parent accounts in Edulink One. New parents can then login and update their details through the data collection screen.
In the Login tab, parents will get user accounts created and the students will have Applicant next to their name. Click Load User Accounts to bring up the accounts and then you can search on “applicants” in the Children column and issue logins from there.


Once logins have been created, the new applicants’ parents can log in and update their data in Edulink One. The data will then be written back to SIMS once approved by the data collection manager.
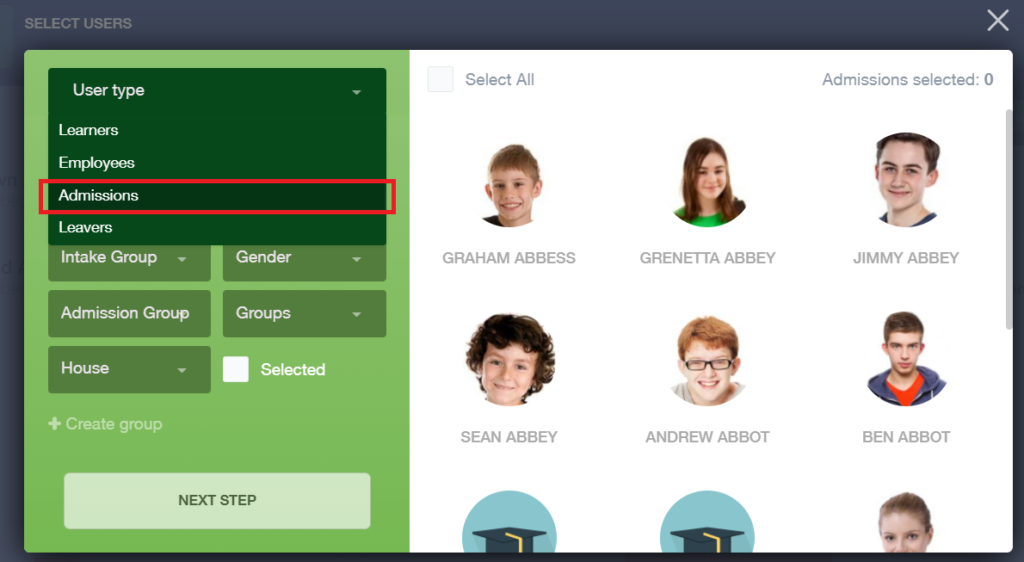
You can also message applicant students and their parents through the messaging system. Just go to send a new message as normal and select Admissions from the Select Users menu.
Have a great summer break!