02/08/2021
4 Steps to make sure you release your exam results successfully
Exam results day needs to go as smoothly as possible. Here are our tips for setting up Edulink One’s Exams functionality to get it right for your school.
Article updated 22/06/2023
1. Make sure your school leavers have access to their exam results on Edulink One.
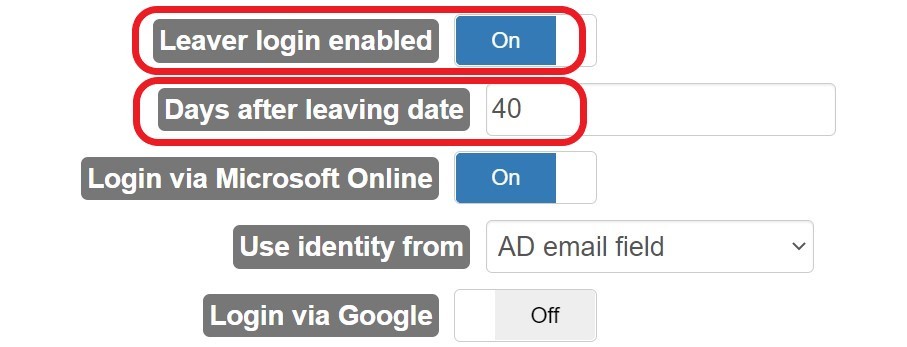
School leavers will automatically lose access to Edulink One once they are taken off-roll. If you want to give leavers access to exam results via Edulink One, you need to give them extended access or their accounts will be disabled.
To do this, make sure you have Leaver Login Enabled on your Login tab and choose the number of days after leaving (off-roll date) they can access their results.
Please also make sure the student LDAP accounts have not been disabled. This will re-enable student and parent logins for the specified period, allowing access to exam results online. It gives them an easy way to demonstrate to potential employers what their exam results were prior to official confirmation/certificates.
You can still contact leavers through the messaging system regardless of this setting.
2. Set an embargo date for your school to release results via Edulink One.
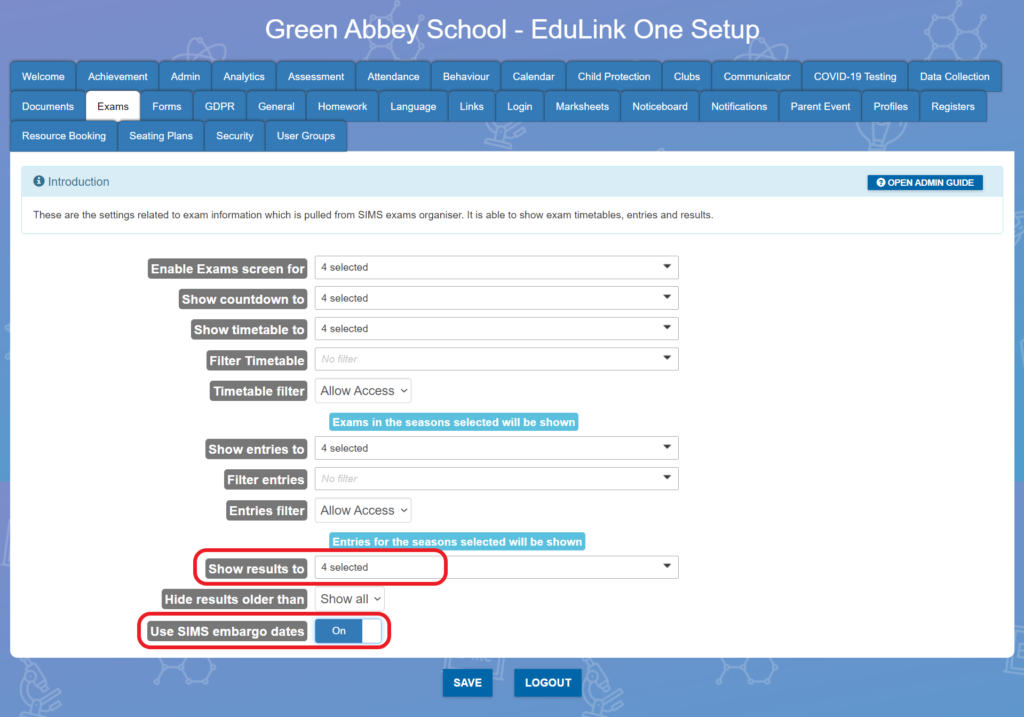
To make sure your results are published at the correct time, we recommend you switch the Use SIMS embargo dates to ON.
This uses the same embargo dates as your school’s SIMS and only publishes results on Edulink One at this time.
However, many schools like students to go into school to receive results in person so that they can discuss results and give any further support if needed.
In this case, you can delay results being published on Edulink One, even if it’s just until later in the day.
To change your settings, simply add Learners to the Show Results To setting manually when you are ready to publish to students.
As a safety net, if no embargo date has been set in SIMS.net, Edulink One will automatically prevent the viewing of any exam results via Edulink One between the date/times below:
00:00 16/08/2023 – 08:00am 17/08/2023 AS/A Level
00:00 23/08/2023 – 08:00am 24/08/2023 GCSE
Please note: This will affect ALL exam results.
3. Make sure students receive their results before their parents
It’s really important that students receive their results before their parents get to see them. It certainly wouldn’t be fair for a parent to be able to check Edulink One and find out the results before the student.
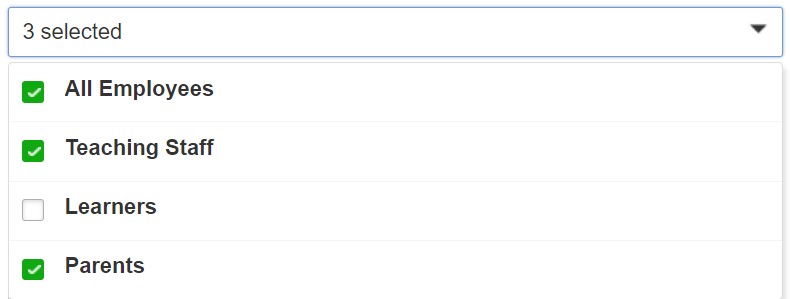
To avoid this, set the Show Results To field in the Exams tab to Learners and Staff only first.
Depending on your policy you can add parental access at a later date after students have collected their results. We’d suggest a couple of days after results have been published.
Simply add Parents to this setting when you are ready to publish to parents and carers.
4. Send results documents by email
You can now send exam results to students by email by using Edulink One’s document messaging. You could do this as an alternative to using the Edulink One Exams function or in conjunction with it.
Step1- Build the results reports in SIMS.net
Firstly, staff will need to run Statement of Results in SIMS to create the exam results report to send by email.
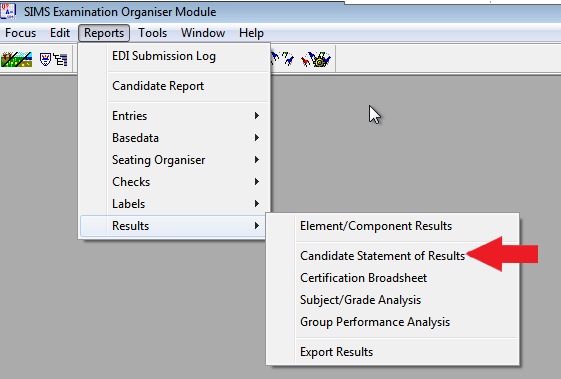
In SIMS, open Exams Organiser.
Select Reports from the top menu then > Candidate Statement of Results from the drop-down menu.
Select the results you want to build reports for and click Export to DMS. You will now have created the reports and you can check students’ documents to confirm.
Step 2 – Pull reports into Edulink One
Secondly, you need to log into Edulink One’s administration settings.
Here, you need to do a Document Cache before you send out the results (bottom of the Welcome tab), to ensure you have the most up to date documents.
If you’re not sure how to do this, you can read our article here.

Step 3 – Email results in Edulink One
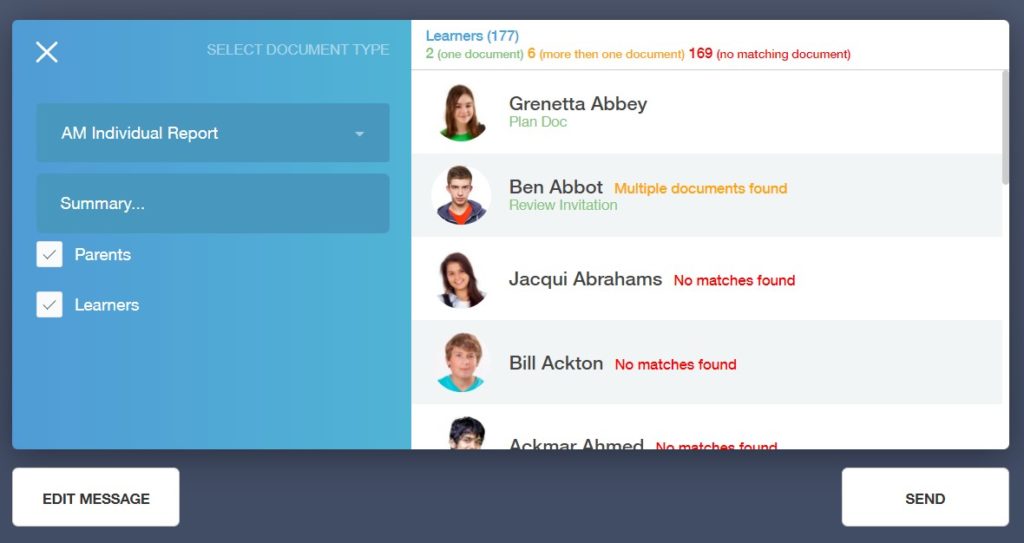
Next, simply sign into the main Edulink One app and go to the document messaging icon. Select the Statement of Results document and the students you want to message, select students/parents to choose who you want to send the documents to go, amend the message if needed and confirm sending.
You can read a more detailed ‘how to’ on document messaging here.
Now you should be set up for releasing your exam results with Edulink One.
You may also be interested in our Tips for Rolling Forward to the New Academic Year article.


